OpenDaVINCI Tutorials
How to use concurrency
How to use concurrency
OpenDaVINCI has a built-in platform-independent concurrency engine. Concurrency is realized on Linux-based and BSD-based operating systems using pthreads and on Windows by using C++11 features. The sources for this example are available at https://github.com/se-research/OpenDaVINCI/tree/master/tutorials/service
In order to use concurrency in a user-supplied module, you will find a simple example below.
MyService.hpp:
#include <opendavinci/odcore/base/Service.h>

// Concurrency is provided by the class odcore::base::Service.
class MyService : public odcore::base::Service {

    // Your class needs to implement the method void beforeStop().
    virtual void beforeStop();

    // Your class needs to implement the method void run().
    virtual void run();

};
MyService.cpp:
#include <stdint.h>
#include <iostream>
#include <opendavinci/odcore/base/Thread.h>

#include "MyService.hpp"

using namespace std;

// Your class needs to implement the method void beforeStop().
void MyService::beforeStop() {
    // This block is executed right before
    // the thread will be stopped.
    cout << "This method is called right before "
         << "isRunning will return false." << endl;
}

// Your class needs to implement the method void run().
void MyService::run() {
    // Here, you can do some initialization of
    // resources (e.g. data structures and the like).
    cout << "Here, I can do some initialization as the "
         << "calling thread, which will start this service, "
         << "will be blocked until serviceReady() has been called." << endl;

    serviceReady();

    // This is the body of the concurrently executed method.
    while (isRunning()) {
        cout << "This message is printed every second." << endl;

        const uint32_t ONE_SECOND = 1000 * 1000;
        odcore::base::Thread::usleepFor(ONE_SECOND);
    }
}

int32_t main(int32_t argc, char **argv) {
    MyService s;

    s.start();
    const uint32_t ONE_SECOND = 1000 * 1000;
    odcore::base::Thread::usleepFor(10 * ONE_SECOND);

    s.stop();
}
Your class needs to derive from odcore::base::Service, which is provided in
#include <opendavinci/odcore/base/Service.h> in the include directory opendavinci.
This class provides two methods that need to be implemented in deriving classes:
void beforeStop() and void run(). The former method is called
from an outside thread intending to stop the concurrently executing thread; thus
any shared resources can be released properly for example. The latter method will
be executed in a new thread running concurrently to the calling thread.
To detach the execution of the newly created thread from the calling one, the
method serviceReady() needs to be called to signal to the calling thread that
the new thread is initialized and will now enter, e.g., its main processing loop; the calling thread is blocked
from any further execution until this method is called. This synchronization dependency
ensures that both resources that need to be provided by the operating system
to run a thread are available and ready, and any shared resources like data
structures that are needed from a deriving class are set up and ready.
You can compile and link the example assuming the file is called MyService.cpp:
g++ -std=c++11 -I /usr/include -c MyService.cpp -o MyService.o
g++ -o service MyService.o -lopendavinci -lpthread
Running the example above will print the following on the console:
$ ./service
Here, I can do some initialization as the calling thread, which will start this service, will be blocked until serviceReady() has been called.
This message is printed every second.
This message is printed every second.
This message is printed every second.
This message is printed every second.
This message is printed every second.
This message is printed every second.
This message is printed every second.
This message is printed every second.
This message is printed every second.
This message is printed every second.
This method is called right before isRunning will return false.
How to use realtime concurrency
OpenDaVINCI has a built-in realtime concurrency engine available only on Linux platforms with rt-preempt kernels. The sources for this example are available at https://github.com/se-research/OpenDaVINCI/tree/master/tutorials/realtimeservice
In order to use realtime concurrency in a user-supplied module, you will find a simple example below.
MyRealtimeService.hpp:
#include <opendavinci/odcore/base/RealtimeService.h>

// Realtime concurrency is provided by the class odcore::base::RealtimeService.
class MyRealtimeService : public odcore::base::RealtimeService {

    public:
        MyRealtimeService(const enum PERIOD &period);

        // Your class needs to implement the method void nextTimeSlice().
        virtual void nextTimeSlice();

};
MyRealtimeService.cpp:
#include <stdint.h>
#include <iostream>
#include <opendavinci/odcore/base/Thread.h>

#include "MyRealtimeService.hpp"

using namespace std;

MyRealtimeService::MyRealtimeService(const enum PERIOD &period) :
    odcore::base::RealtimeService(period) {}

void MyRealtimeService::nextTimeSlice() {
    cout << "This message is printed every 100 ms." << endl;
}

int32_t main(int32_t argc, char **argv) {
    MyRealtimeService rts(odcore::base::RealtimeService::ONEHUNDREDMILLISECONDS);

    rts.start();

    const uint32_t ONE_SECOND = 1000 * 1000;
    odcore::base::Thread::usleepFor(5 * ONE_SECOND);

    rts.stop();
}
Your class needs to derive from odcore::base::RealtimeService, which is provided in
#include <opendavinci/odcore/base/RealtimeService.h> in the include directory opendavinci.
This class provides one method that needs to be implemented in deriving classes:
void nextTimeSlice(). This method will be called with the specified periodicity.
Furthermore, the deriving class needs to pass the desired periodicity to the superclass RealtimeService.
You can compile and link the example:
g++ -std=c++11 -I /usr/include -c MyRealtimeService.cpp -o MyRealtimeService.o
g++ -o realtimeservice MyRealtimeService.o -lopendavinci -lpthread -lrt
The resulting program can be run as superuser (as the scheduling properties will be adjusted) and will print the following on the console:
$ sudo ./realtimeservice
This message is printed every 100 ms.
This message is printed every 100 ms.
This message is printed every 100 ms.
This message is printed every 100 ms.
This message is printed every 100 ms.
This message is printed every 100 ms.
This message is printed every 100 ms.
This message is printed every 100 ms.
This message is printed every 100 ms.
This message is printed every 100 ms.
This message is printed every 100 ms.
This message is printed every 100 ms.
This message is printed every 100 ms.
This message is printed every 100 ms.
This message is printed every 100 ms.
This message is printed every 100 ms.
Dining Philosophers
This example illustrates the known “Dining Philosophers” problem. The sources for this example are available at https://github.com/se-research/OpenDaVINCI/tree/master/tutorials/diningphilosophers
The background for this example is well described here at https://en.wikipedia.org/wiki/Dining_philosophers_problem
How to exchange data in distributed processes
Serial connection
How to send bytes over a serial link
OpenDaVINCI has a built-in serial port handling engine based on https://github.com/wjwwood/serial. This library realizes serial communication on Linux- and BSD-based platforms as well as on Windows. The sources for this example are available at https://github.com/se-research/OpenDaVINCI/tree/master/tutorials/serialsendbytes
In order to send bytes over a serial link, you will find a simple example below.
SerialSendBytes.cpp:
#include <stdint.h>
#include <iostream>
#include <string>
#include <memory>
#include <opendavinci/odcore/wrapper/SerialPort.h>
#include <opendavinci/odcore/wrapper/SerialPortFactory.h>

using namespace std;

// We add some of OpenDaVINCI's namespaces for the sake of readability.
using namespace odcore;
using namespace odcore::wrapper;

int32_t main(int32_t argc, char **argv) {
    const string SERIAL_PORT = "/dev/pts/19";
    const uint32_t BAUD_RATE = 19200;

    // We are using OpenDaVINCI's std::shared_ptr to automatically
    // release any acquired resources.
    try {
        std::shared_ptr<SerialPort> serial(SerialPortFactory::createSerialPort(SERIAL_PORT, BAUD_RATE));

        serial->send("Hello World\r\n");
    }
    catch(string &exception) {
        cerr << "Serial port could not be created: " << exception << endl;
    }
}
To send bytes over a serial link, your application needs to include
<opendavinci/odcore/wrapper/SerialPort.h> and <opendavinci/odcore/wrapper/SerialPortFactory.h> that
encapsulate the platform-specific implementations.
SerialPortFactory provides a static method called createSerialPort that
tries to connect to the specified serial port. On success, this call will return
a pointer to a SerialPort instance that is used to handle the data transfer.
On failure, the method createSerialPort will throw an exception of type
string with an error message.
If the connection could be successfully established, the method send can be
used to send data of type string to the other end of the serial link.
To conveniently handle the resource management of releasing the acquired system
resources, a std::shared_ptr is used that automatically releases memory that
is no longer used.
You can compile and link the example:
g++ -std=c++11 -I /usr/include -c SerialSendBytes.cpp -o SerialSendBytes.o
g++ -o serialsendbytes SerialSendBytes.o -lopendavinci -lpthread
To test the program, we create a simple virtual serial port on Linux using the
tool socat:
$ socat -d -d pty,raw,echo=0 pty,raw,echo=0
2015/06/13 11:17:17 socat[2737] N PTY is /dev/pts/19
2015/06/13 11:17:17 socat[2737] N PTY is /dev/pts/20
2015/06/13 11:17:17 socat[2737] N starting data transfer loop with FDs [3,3] and [5,5]
Please note that the tutorial program uses /dev/pts/19 to send data to; in
the case that your setup has a different pts from socat, you need to adjust
the source code.
Next, start a screen session on the other end of the serial connection:
$ screen /dev/pts/20
Now, you can run the resulting program:
$ ./serialsendbytes
$
The tool screen will print Hello World.
How to receive bytes from a serial connection
OpenDaVINCI has a built-in serial port handling engine based on https://github.com/wjwwood/serial. This library realizes serial communication on Linux- and BSD-based platforms as well as on Windows. The sources for this example are available at https://github.com/se-research/OpenDaVINCI/tree/master/tutorials/serialreceivebytes
In order to receive bytes over a serial link, you will find a simple example below.
SerialReceiveBytes.hpp:
#include <opendavinci/odcore/io/StringListener.h>

// This class will handle the bytes received via a serial link.
class SerialReceiveBytes : public odcore::io::StringListener {

    // Your class needs to implement the method void nextString(const std::string &s).
    virtual void nextString(const std::string &s);
};
To receive any data, we firstly declare a class that implements the interface
odcore::io::StringListener. This method will handle any bytes received
from the low level SerialPort. Here, your application should realize an
application-specific protocol.
SerialReceiveBytes.cpp:
#include <stdint.h>
#include <iostream>
#include <string>
#include <memory>
#include <opendavinci/odcore/base/Thread.h>
#include <opendavinci/odcore/wrapper/SerialPort.h>
#include <opendavinci/odcore/wrapper/SerialPortFactory.h>

#include "SerialReceiveBytes.hpp"

using namespace std;

void SerialReceiveBytes::nextString(const string &s) {
    cout << "Received " << s.length() << " bytes containing '" << s << "'" << endl;
}

// We add some of OpenDaVINCI's namespaces for the sake of readability.
using namespace odcore;
using namespace odcore::wrapper;

int32_t main(int32_t argc, char **argv) {
    const string SERIAL_PORT = "/dev/pts/20";
    const uint32_t BAUD_RATE = 19200;

    // We are using OpenDaVINCI's std::shared_ptr to automatically
    // release any acquired resources.
    try {
        std::shared_ptr<SerialPort>
            serial(SerialPortFactory::createSerialPort(SERIAL_PORT, BAUD_RATE));

        // This instance will handle any bytes that are received
        // from our serial port.
        SerialReceiveBytes handler;
        serial->setStringListener(&handler);

        // Start receiving bytes.
        serial->start();

        const uint32_t ONE_SECOND = 1000 * 1000;
        odcore::base::Thread::usleepFor(10 * ONE_SECOND);

        // Stop receiving bytes and unregister our handler.
        serial->stop();
        serial->setStringListener(NULL);
    }
    catch(string &exception) {
        cerr << "Error while creating serial port: " << exception << endl;
    }
}
To receive bytes from a serial link, your application needs to include
<opendavinci/odcore/wrapper/SerialPort.h> and <opendavinci/odcore/wrapper/SerialPortFactory.h> that
encapsulate the platform-specific implementations.
SerialPortFactory provides a static method called createSerialPort that allows
you to receive bytes from a serial link. On success, this call will return
a pointer to a SerialPort instance that is used to handle the data transfer.
On failure, the method createSerialPort will throw an exception of type
string with an error message.
If the serial port could be successfully created, we register our StringListener
at the newly created SerialPort to be invoked when new bytes are available to
be interpreted by a user-supplied protocol.
Once we have registered our StringListener, the SerialPort is simply
started and the main thread is falling asleep for a while in our example. After some
time, the program will stop receiving bytes, unregister the StringListener,
and release the system resources.
To conveniently handle the resource management of releasing the acquired system
resources, a std::shared_ptr is used that automatically releases memory that
is no longer used.
Please note that once you have stopped SerialPort you cannot reuse it and
thus, you need to create a new one.
You can compile and link the example:
g++ -std=c++11 -I /usr/include -c SerialReceiveBytes.cpp -o SerialReceiveBytes.o
g++ -o serialreceivebytes SerialReceiveBytes.o -lopendavinci -lpthread
To test the program, we create a simple virtual serial port on Linux using the
tool socat:
$ socat -d -d pty,raw,echo=0 pty,raw,echo=0
2015/06/13 11:17:17 socat[2737] N PTY is /dev/pts/19
2015/06/13 11:17:17 socat[2737] N PTY is /dev/pts/20
2015/06/13 11:17:17 socat[2737] N starting data transfer loop with FDs [3,3] and [5,5]
Please note that the tutorial program uses /dev/pts/20 to send data to; in
the case that your setup has a different pts from socat, you need to adjust
the source code.
Now, you can start the resulting program to listen for data:
$ ./serialreceivebytes
Next, we simply pipe some data through the other end of the virtual port:
$ echo "Hello World" > /dev/pts/19
The resulting program will print:
Received partial string of length 12 bytes containing 'Hello World
'
UDP connection
How to send bytes to a UDP server
OpenDaVINCI has a built-in UDP handling engine realized on Linux-based and BSD-based operating systems using POSIX sockets and on Windows using WinSock. The sources for this example are available at https://github.com/se-research/OpenDaVINCI/tree/master/tutorials/udpsendbytes
In order to send bytes to a UDP server, you will find a simple example below.
UDPSendBytes.cpp:
#include <stdint.h>
#include <iostream>
#include <string>
#include <memory>
#include <opendavinci/odcore/io/udp/UDPSender.h>
#include <opendavinci/odcore/io/udp/UDPFactory.h>

using namespace std;

// We add some of OpenDaVINCI's namespaces for the sake of readability.
using namespace odcore;
using namespace odcore::io::udp;

int32_t main(int32_t argc, char **argv) {
    const string RECEIVER = "127.0.0.1";
    const uint32_t PORT = 1234;

    // We are using OpenDaVINCI's std::shared_ptr to automatically
    // release any acquired resources.
    try {
        std::shared_ptr<UDPSender> udpsender(UDPFactory::createUDPSender(RECEIVER, PORT));

        udpsender->send("Hello World\r\n");
    }
    catch(string &exception) {
        cerr << "Data could not be sent: " << exception << endl;
    }
}
To send bytes over UDP to a UDP socket, your application needs to include
<opendavinci/odcore/io/udp/UDPSender.h> and <opendavinci/odcore/io/udp/UDPFactory.h> that encapsulate
the platform-specific implementations.
UDPFactory provides a static method called createUDPSender that
allows you to send bytes to the specified UDP server. On success, this call will return
a pointer to a UDPServer instance that is used to handle the data transfer.
On failure, the method createUDPSender will throw an exception of type
string with an error message.
If the connection could be successfully established, the method send can be
used to send data of type string to the specified UDP server.
To conveniently handle the resource management of releasing the acquired system
resources, a std::shared_ptr is used that automatically releases memory that
is no longer used.
You can compile and link the example:
g++ -std=c++11 -I /usr/include -c UDPSendBytes.cpp -o UDPSendBytes.o
g++ -o udpsendbytes UDPSendBytes.o -lopendavinci -lpthread
To test the program, we create a simple UDP server awaiting data by using the tool ``nc``(netcat):
$ nc -l -u -p 1234
The resulting program can be run:
$ ./udpsendbytes
$
The tool nc will print Hello World and then terminate as the connection
is closed on exiting udpsendbytes.
How to receive bytes as a UDP server
OpenDaVINCI has a built-in UDP handling engine realized on Linux-based and BSD-based operating systems using POSIX sockets and on Windows using WinSock. The sources for this example are available at https://github.com/se-research/OpenDaVINCI/tree/master/tutorials/udpreceivebytes
In order to receive bytes as a UDP server, you will find a simple example below.
UDPReceiveBytes.hpp:
#include <opendavinci/odcore/io/StringListener.h>

// This class will handle the bytes received via a UDP socket.
class UDPReceiveBytes : public odcore::io::StringListener {

    // Your class needs to implement the method void nextString(const std::string &s).
    virtual void nextString(const std::string &s);
};
To receive any data, we firstly declare a class that implements the interface
odcore::io::StringListener. This class will be registered as listener to
our UDP socket that we create later.
UDPReceiveBytes.cpp:
#include <stdint.h>
#include <iostream>
#include <string>
#include <memory>
#include <opendavinci/odcore/base/Thread.h>
#include <opendavinci/odcore/io/udp/UDPReceiver.h>
#include <opendavinci/odcore/io/udp/UDPFactory.h>

#include "UDPReceiveBytes.hpp"

using namespace std;

void UDPReceiveBytes::nextString(const string &s) {
    cout << "Received " << s.length() << " bytes containing '" << s << "'" << endl;
}

// We add some of OpenDaVINCI's namespaces for the sake of readability.
using namespace odcore;
using namespace odcore::io;
using namespace odcore::io::udp;

int32_t main(int32_t argc, char **argv) {
    const string RECEIVER = "0.0.0.0";
    const uint32_t PORT = 1234;

    // We are using OpenDaVINCI's std::shared_ptr to automatically
    // release any acquired resources.
    try {
        std::shared_ptr<UDPReceiver>
            udpreceiver(UDPFactory::createUDPReceiver(RECEIVER, PORT));

        // This instance will handle any bytes that are received
        // by our UDP socket.
        UDPReceiveBytes handler;
        udpreceiver->setStringListener(&handler);

        // Start receiving bytes.
        udpreceiver->start();

        const uint32_t ONE_SECOND = 1000 * 1000;
        odcore::base::Thread::usleepFor(10 * ONE_SECOND);

        // Stop receiving bytes and unregister our handler.
        udpreceiver->stop();
        udpreceiver->setStringListener(NULL);
    }
    catch(string &exception) {
        cerr << "Error while creating UDP receiver: " << exception << endl;
    }
}
To receive bytes from a UDP socket, your application needs to include
<opendavinci/odcore/io/udp/UDPReceiver.h> and <opendavinci/odcore/io/udp/UDPFactory.h> that encapsulate
the platform-specific implementations.
UDPFactory provides a static method called createUDPReceiver that allows
you to receive bytes from a listening UDP socket. On success, this call will return
a pointer to a UDPReceiver instance that is used to handle the data transfer.
On failure, the method createUDPReceiver will throw an exception of type
string with an error message.
If the UDP socket could be successfully created, we register our StringListener
at the newly created UDPReceiver to be invoked when new bytes are available.
Handling the bytes between the UDP socket and the StringListener notification
is happening in the same thread.
Once we have registered our StringListener, the UDPReceiver is simply
started and the main thread is falling asleep for a while in our example. After some
time, the program will stop receiving bytes, unregister the StringListener,
and release the system resources.
To conveniently handle the resource management of releasing the acquired system
resources, a std::shared_ptr is used that automatically releases memory that
is no longer used.
Please note that once you have stopped UDPReceiver you cannot reuse it and
thus, you need to create a new one.
You can compile and link the example:
g++ -std=c++11 -I /usr/include -c UDPReceiveBytes.cpp -o UDPReceiveBytes.o
g++ -o udpreceivebytes UDPReceiveBytes.o -lopendavinci -lpthread
The resulting program can be run:
$ ./udpreceivebytes
To test the program, we pipe a string through the tool nc:
$ echo "Hello World" | nc -u 127.0.0.1 1234
Our program udpreceivebytes will print Hello World.
How to receive packets as a UDP server
OpenDaVINCI has a built-in UDP handling engine realized on Linux-based and BSD-based operating systems using POSIX sockets and on Windows using WinSock. The sources for this example are available at https://github.com/se-research/OpenDaVINCI/tree/master/tutorials/udpreceivepackets
In order to receive packets as a UDP server, you will find a simple example below.
UDPReceivePackets.hpp:
#include <opendavinci/odcore/io/PacketListener.h>

// This class will handle packets received via a UDP socket.
class UDPReceivePackets : public odcore::wrapper::PacketListener {

    // Your class needs to implement the method void void nextPacket(const odcore::io::Packet &p).
    virtual void nextPacket(const odcore::io::Packet &p);
};
To receive any packets, we firstly declare a class that implements the interface
odcore::wrapper::PacketListener. This class will be registered as listener to
our UDP socket that we create later. Packets provide the sending address in
addition to the pure StringListener interface.
UDPReceivePackets.cpp:
#include <stdint.h>
#include <iostream>
#include <string>
#include <memory>
#include <opendavinci/odcore/base/Thread.h>
#include <opendavinci/odcore/io/udp/UDPReceiver.h>
#include <opendavinci/odcore/io/udp/UDPFactory.h>

#include "UDPReceivePackets.hpp"

using namespace std;

void UDPReceivePackets::nextPacket(const odcore::data::Packet &p) {
    cout << "Received a packet from " << p.getSender() << " at "
         << p.getReceived().toString() << " "
         << "with " << p.getData().length() << " bytes containing '"
         << p.getData() << "'" << endl;
}

// We add some of OpenDaVINCI's namespaces for the sake of readability.
using namespace odcore;
using namespace odcore::io;
using namespace odcore::io::udp;

int32_t main(int32_t argc, char **argv) {
    const string RECEIVER = "0.0.0.0";
    const uint32_t PORT = 1234;

    // We are using OpenDaVINCI's std::shared_ptr to automatically
    // release any acquired resources.
    try {
        std::shared_ptr<UDPReceiver>
            udpreceiver(UDPFactory::createUDPReceiver(RECEIVER, PORT));

        // This instance will handle any packets that are received
        // by our UDP socket.
        UDPReceivePackets handler;
        udpreceiver->setPacketListener(&handler);

        // Start receiving bytes.
        udpreceiver->start();

        const uint32_t ONE_SECOND = 1000 * 1000;
        odcore::base::Thread::usleepFor(10 * ONE_SECOND);

        // Stop receiving bytes and unregister our handler.
        udpreceiver->stop();
        udpreceiver->setPacketListener(NULL);
    }
    catch(string &exception) {
        cerr << "Error while creating UDP receiver: " << exception << endl;
    }
}
To receive a packet from a UDP socket, your application needs to include
<opendavinci/odcore/io/udp/UDPReceiver.h> and <opendavinci/odcore/io/udp/UDPFactory.h> that encapsulate
the platform-specific implementations.
UDPFactory provides a static method called createUDPReceiver that allows
you to receive bytes from a listening UDP socket. On success, this call will return
a pointer to a UDPReceiver instance that is used to handle the data transfer.
On failure, the method createUDPReceiver will throw an exception of type
string with an error message.
If the UDP socket could be successfully created, we register our PacketListener
at the newly created UDPReceiver to be invoked when a new packet is available.
In contrast to the StringListener, the data processing for handling Packets
is decoupled between the low level UDP socket and the user-supplied handler. Thus,
whenever a new Packet has been received, it is enqueued and the user application
is invoked from a separate thread to avoid unnecessary waiting times.
Once we have registered our PacketListener, the UDPReceiver is simply
started and the main thread is falling asleep for a while in our example. After some
time, the program will stop receiving bytes, unregister the PacketListener,
and release the system resources.
To conveniently handle the resource management of releasing the acquired system
resources, a std::shared_ptr is used that automatically releases memory that
is no longer used.
Please note that once you have stopped UDPReceiver you cannot reuse it and
thus, you need to create a new one.
You can compile and link the example:
g++ -std=c++11 -I /usr/include -c UDPReceivePackets.cpp -o UDPReceivePackets.o
g++ -o udpreceivepackets UDPReceivePackets.o -lopendavinci -lpthread
The resulting program can be run:
$ ./udpreceivepackets
To test the program, we pipe a string through the tool nc:
$ echo "Hello World" | nc -u 127.0.0.1 1234
Our program udpreceivepackets will print:
Received a packet from 127.0.0.1, with 13 bytes containing 'Hello World!
'
TCP connection
How to send bytes to a TCP server
OpenDaVINCI has a built-in TCP connection handling engine realized on Linux-based and BSD-based operating systems using POSIX sockets and on Windows using WinSock. The sources for this example are available at https://github.com/se-research/OpenDaVINCI/tree/master/tutorials/tcpsendbytes
In order to send bytes to an existing TCP server, you will find a simple example below.
TCPSendBytes.cpp:
#include <stdint.h>
#include <iostream>
#include <string>
#include <memory>
#include <opendavinci/odcore/io/tcp/TCPConnection.h>
#include <opendavinci/odcore/io/tcp/TCPFactory.h>

using namespace std;

// We add some of OpenDaVINCI's namespaces for the sake of readability.
using namespace odcore;
using namespace odcore::io::tcp;

int32_t main(int32_t argc, char **argv) {
    const string RECEIVER = "127.0.0.1";
    const uint32_t PORT = 1234;

    // We are using OpenDaVINCI's std::shared_ptr to automatically
    // release any acquired resources.
    try {
        std::shared_ptr<TCPConnection>
            connection(TCPFactory::createTCPConnectionTo(RECEIVER, PORT));

        connection->send("Hello World\r\n");
    }
    catch(string &exception) {
        cerr << "Data could not be sent: " << exception << endl;
    }
}
To send bytes over a TCP link to a TCP server, your application needs to include
<opendavinci/odcore/io/tcp/TCPConnection.h> and <opendavinci/odcore/io/tcp/TCPFactory.h> that encapsulate
the platform-specific implementations.
TCPFactory provides a static method called createTCPConnectionTo that
tries to connect to the specified TCP server. On success, this call will return
a pointer to a TCPConnection instance that is used to handle the data transfer.
On failure, the method createTCPConnectionTo will throw an exception of type
string with an error message.
If the connection could be successfully established, the method send can be
used to send data of type string to the other end of the TCP link.
To conveniently handle the resource management of releasing the acquired system
resources, a std::shared_ptr is used that automatically releases memory that
is no longer used.
You can compile and link the example:
g++ -std=c++11 -I /usr/include -c TCPSendBytes.cpp -o TCPSendBytes.o
g++ -o tcpsendbytes TCPSendBytes.o -lopendavinci -lpthread
To test the program, we create a simple TCP server awaiting connection by using
the tool nc:
$ nc -l -p 1234
The resulting program can be run:
$ ./tcpsendbytes
$
The tool nc will print Hello World and then terminate as the connection
is closed on exiting tcpsendbytes.
In the case of a failed connection attempt, the following exception will be printed on the console:
$ ./tcpsendbytes
Data could not be sent: [PosixTCPConnection] Error connecting to socket
How to receive bytes as a TCP server
OpenDaVINCI has a built-in TCP handling engine realized on Linux-based and BSD-based operating systems using POSIX sockets and on Windows using WinSock. The sources for this example are available at https://github.com/se-research/OpenDaVINCI/tree/master/tutorials/tcpreceivebytes
In order to receive bytes as a TCP server, you will find a simple example below.
TCPReceiveBytes.hpp:
#include <opendavinci/odcore/io/ConnectionListener.h>
#include <opendavinci/odcore/io/StringListener.h>
#include <opendavinci/odcore/io/TCPAcceptorListener.h>
#include <opendavinci/odcore/io/TCPConnection.h>

// This class will handle newly accepted TCP connections.
class TCPReceiveBytes :
    public odcore::io::ConnectionListener,
    public odcore::io::StringListener,
    public odcore::io::tcp::TCPAcceptorListener {

    // Your class needs to implement the method void nextString(const std::string &s).
    virtual void nextString(const std::string &s);

    // Your class needs to implement the method void onNewConnection(std::shared_ptr<odcore::io::tcp::TCPConnection> connection).
    virtual void onNewConnection(std::shared_ptr<odcore::io::tcp::TCPConnection> connection);

    // Your class should implement the method void handleConnectionError() to handle connection errors (like terminated connections).
    virtual void handleConnectionError();
};
To receive any data, we firstly declare a class that implements the interfaces
odcore::io::StringListener to receive bytes and
odcore::io::tcp::TCPAcceptorListener where any newly accepted connections will
be reported to. This class will be registered as listener to our accepting TCP
socket that we create later. In addition, we also register a odcore::io::ConnectionLister
that is invoked in the case of any connection error like the connecting client
has closed the connection.
TCPReceiveBytes.cpp:
#include <stdint.h>
#include <iostream>
#include <string>
#include <memory>
#include <opendavinci/odcore/base/Thread.h>
#include <opendavinci/odcore/io/tcp/TCPAcceptor.h>
#include <opendavinci/odcore/io/tcp/TCPFactory.h>

#include "TCPReceiveBytes.hpp"

using namespace std;

// We add some of OpenDaVINCI's namespaces for the sake of readability.
using namespace odcore;
using namespace odcore::io;
using namespace odcore::io:tcp;

void TCPReceiveBytes::handleConnectionError() {
    cout << "Connection terminated." << endl;
}

void TCPReceiveBytes::nextString(const std::string &s) {
    cout << "Received " << s.length() << " bytes containing '" << s << "'" << endl;
}

void TCPReceiveBytes::onNewConnection(std::shared_ptr<odcore::io::tcp::TCPConnection> connection) {
    if (connection.isValid()) {
        cout << "Handle a new connection." << endl;

        // Set this class as StringListener to receive
        // data from this connection.
        connection->setStringListener(this);

        // Set this class also as ConnectionListener to
        // handle errors originating from this connection.
        connection->setConnectionListener(this);

        // Start receiving data from this connection.
        connection->start();

        // We keep this connection open only for one
        // second before we close it.
        const uint32_t ONE_SECOND = 1000 * 1000;
        odcore::base::Thread::usleepFor(ONE_SECOND);

        // Stop this connection.
        connection->stop();

        // Unregister the listeners.
        connection->setStringListener(NULL);
        connection->setConnectionListener(NULL);
    }
}

int32_t main(int32_t argc, char **argv) {
    const uint32_t PORT = 1234;

    // We are using OpenDaVINCI's std::shared_ptr to automatically
    // release any acquired resources.
    try {
        std::shared_ptr<TCPAcceptor>
            tcpacceptor(TCPFactory::createTCPAcceptor(PORT));

        // This instance will handle any new connections.
        TCPReceiveBytes handler;
        tcpacceptor->setAcceptorListener(&handler);

        // Start accepting new connections.
        tcpacceptor->start();

        const uint32_t ONE_SECOND = 1000 * 1000;
        odcore::base::Thread::usleepFor(10 * ONE_SECOND);

        // Stop accepting new connections and unregister our handler.
        tcpacceptor->stop();
        tcpacceptor->setAcceptorListener(NULL);
    }
    catch(string &exception) {
        cerr << "Error while creating TCP receiver: " << exception << endl;
    }
}
The outlined implementation will provide an overview of how to get notified
about newly connecting clients using TCP; your application should track
new connections in a vector for instance and manage their individual
connection status properly.
To receive bytes from a TCP socket, your application needs to include
<opendavinci/odcore/io/tcp/TCPAcceptor.h> and <opendavinci/odcore/io/tcp/TCPFactory.h> that encapsulate
the platform-specific implementations.
TCPFactory provides a static method called createTCPAcceptor that allows
you to accept new TCP connections. Every new connection is wrapped into a pointer
to an instance of TCPConnection that needs to be handled by a TCPAcceptorListener.
The task for the TCPAcceptorListener is to get the new TCPConnection,
register a StringListener to receive bytes and a ConnectionListener
that is called when an error for this TCP connection occurs, e.g. the client
closes the connection.
TCPFactory will return a pointer to the TCPAcceptor, where our
TCPReceiveBytes handler in turn is registered to handle incoming connection.
On failure, the method createTCPAcceptor will throw an exception of type
string with an error message.
If the TCPAcceptor could be successfully created, we register our TCPReceiveBytes
to handle new connections. Afterwards, we start our TCPAcceptor to wait for
incoming TCP connections. After some time, the program will stop waiting for new
connections, unregister the TCPReceiveBytes, and release the system resources.
To conveniently handle the resource management of releasing the acquired system
resources, a std::shared_ptr is used that automatically releases memory that
is no longer used.
Please note that once you have stopped TCPAcceptor you cannot reuse it and
thus, you need to create a new one.
You can compile and link the example:
g++ -std=c++11 -I /usr/include -c TCPReceiveBytes.cpp -o TCPReceiveBytes.o
g++ -o tcpreceivebytes TCPReceiveBytes.o -lopendavinci -lpthread
The resulting program can be run:
$ ./tcpreceivebytes
To test the program, we use the test program tcpsendbytes as described here
https://github.com/se-research/OpenDaVINCI/tree/master/tutorials/tcpsendbytes:
$ ./tcpsendbytes
Our program tcpreceivebytes will print:
Handle a new connection.
Received 13 bytes containing 'Hello World
'
Connection terminated.
How to design distributed software systems
How to setup the build environment for your software system
This example demonstrates how to setup your build environment.
“Hello World” example - compiling manually
Let’s assume you have implemented a basic “Hello World” application to start with as shown in the following.
HelloWorldExample.h:
#include <opendavinci/odcore/base/TimeTriggeredConferenceClientModule.h>

class HelloWorldExample : public odcore::base::module::TimeTriggeredConferenceClientModule {
    private:
        HelloWorldExample(const HelloWorldExample &/*obj*/);
        HelloWorldExample& operator=(const HelloWorldExample &/*obj*/);

    public:
        /**
         * Constructor.
         *
         * @param argc Number of command line arguments.
         * @param argv Command line arguments.
         */
        HelloWorldExample(const int32_t &argc, char **argv);

        virtual ~HelloWorldExample();

        odcore::data::dmcp::ModuleExitCodeMessage::ModuleExitCode body();

    private:
        virtual void setUp();

        virtual void tearDown();
};
The accompanying implementation for this header file is provided in the following.
HelloWorldExample.cpp:
#include <iostream>

#include "HelloWorldExample.h"

using namespace std;

// We add some of OpenDaVINCI's namespaces for the sake of readability.
using namespace odcore::base::module;

HelloWorldExample::HelloWorldExample(const int32_t &argc, char **argv) :
    TimeTriggeredConferenceClientModule(argc, argv, "HelloWorldExample")
{}

HelloWorldExample::~HelloWorldExample() {}

void HelloWorldExample::setUp() {
    cout << "This method is called before the component's body is executed." << endl;
}

void HelloWorldExample::tearDown() {
    cout << "This method is called after the program flow returns from the component's body." << endl;
}

odcore::data::dmcp::ModuleExitCodeMessage::ModuleExitCode HelloWorldExample::body() {
    cout << "Hello OpenDaVINCI World!" << endl;

    return odcore::data::dmcp::ModuleExitCodeMessage::OKAY;
}
To start the component, we define the main() function in a separate file.
HelloWorldExampleMain.cpp:
#include "HelloWorldExample.h"

int32_t main(int32_t argc, char **argv) {
    HelloWorldExample hwe(argc, argv);

    return hwe.runModule();
}
Now, we have three files, HelloWorldExample.h, HelloWorldExample.cpp, and HelloWorldExampleMain.cpp. The first two files contain the software component for the “Hello World” example, the latter file is simply starting the component.
Now, you can compile and link the example manually:
$ g++ -std=c++11 -I /usr/include -c HelloWorldExample.cpp -o HelloWorldExample.o
$ g++ -std=c++11 -I /usr/include -c HelloWorldExampleMain.cpp -o HelloWorldExampleMain.o
$ g++ -o helloworldexample HelloWorldExampleMain.o HelloWorldExample.o -lopendavinci -lpthread
“Hello World” example - compiling using CMake
Next, we are going to extend the previous example and introduce CMake as the build system. The advantage of CMake is that you describe the build of your software independent from the build tools like make, KDevelop, or the like.
We create a file named CMakeLists.txt to describe the actual source code artifacts that comprise our final binary. After the definition of the CMake version that is required (2.8) in our example, we name the project that we are building. Next, we need to declare the dependency to OpenDaVINCI (cf. (1)). As OpenDaVINCI can be either installed to /usr from the pre-compiled packages or in a specific directory, we need to adjust this possibility accordingly in the CMakeLists.txt. Therefore, OpenDaVINCI provides a CMake-script to determine the correct settings for locating OpenDaVINCI’s include headers and linker settings. This script considers the parameter OPENDAVINCI_DIR where we can specify at commandline where CMake shall search for OpenDaVINCI. If this parameter is left unset, OpenDaVINCI is assumed to be installed in your distributions default locations, like /usr or /usr/local. Next, FIND_PACKAGE(...) is called to actually find OpenDaVINCI.
If the FIND_PACKAGE(...) succeeds, the variables OPENDAVINCI_INCLUDE_DIRS and OPENDAVINCI_LIBRARIES. We are using the former to refer to the include headers so that HelloWorldExample.h can be compiled using the OpenDaVINCI classes.
Next, we specify the sources (cf. (3)) that are required to create the binary. Afterwards, we define the executable and the libraries that are required to link. The last line specifies where the resulting shall be installed to:
CMAKE_MINIMUM_REQUIRED (VERSION 2.8)

PROJECT (helloworldexample)

# Compile flags to enable C++11.
SET (CXX_OPTIONS       "-std=c++11")
SET (CMAKE_CXX_FLAGS "${CMAKE_CXX_FLAGS} -fPIC ${CXX_OPTIONS} -pipe")

# (1) Find OpenDaVINCI.
IF("${OPENDAVINCI_DIR}" STREQUAL "")
    SET(OPENDAVINCI_DIR "${CMAKE_INSTALL_PREFIX}")
ELSE()
    SET (CMAKE_MODULE_PATH "${OPENDAVINCI_DIR}/share/cmake-${CMAKE_MAJOR_VERSION}.${CMAKE_MINOR_VERSION}/Modules" ${CMAKE_MODULE_PATH})
ENDIF()
FIND_PACKAGE (OpenDaVINCI REQUIRED)

# (2) Set header files from OpenDaVINCI.
INCLUDE_DIRECTORIES (${OPENDAVINCI_INCLUDE_DIRS})

# (3) Build the project.
SET(SOURCES HelloWorldExample.cpp HelloWorldExampleMain.cpp)
ADD_EXECUTABLE (helloworldexample ${SOURCES})
TARGET_LINK_LIBRARIES (helloworldexample ${OPENDAVINCI_LIBRARIES})

# (4) Install the binary.
INSTALL(TARGETS helloworldexample RUNTIME DESTINATION bin COMPONENT tutorials)
Having the CMakeLists.txt file enables us to create the build environment. Therefore, we first create a build folder to separate the compiled object code from the sources:
$ mkdir build
$ cd build
Next, we call CMake to create the build environment for us (make for instance):
$ cmake ..
In this case, the OpenDaVINCI libraries would be expected to reside at /usr (or /usr/local). If you have the OpenDaVINCI libraries installed at a different location, you need to call CMake using the commandline parameter OPENDAVINCI_DIR:
$ cmake -D OPENDAVINCI_DIR=<location of OpenDaVINCI include files and library> ..
The aforementioned call would result in trying to install the binary to /usr (or /usr/local). To specify a different installation folder, you need to invoke CMake as follows:
$ cmake -D OPENDAVINCI_DIR=<location of OpenDaVINCI include files and library> -D CMAKE_INSTALL_PREFIX=<location where you want to install the binaries> ..
After running cmake, we run make to build the binary:
$ make
How to design a time-triggered software component
OpenDaVINCI allows the development of distributed software components. These components can run on the same machine or on different ones using various types of communication and scheduling. Both are provided transparently to the user of the OpenDaVINCI middleware.
This example demonstrates how to design a time-triggered software component. The sources for this example are available at https://github.com/se-research/OpenDaVINCI/tree/master/tutorials/timetrigger
“Hello World” example
A time-triggered software component is derived from odcore::base::TimeTriggeredConferenceClientModule,
provided in <opendavinci/odcore/base/module/TimeTriggeredConferenceClientModule.h>.
TimeTriggerExample.h:
#include <opendavinci/odcore/base/TimeTriggeredConferenceClientModule.h>

class TimeTriggerExample : public odcore::base::module::TimeTriggeredConferenceClientModule {
    private:
        TimeTriggerExample(const TimeTriggerExample &/*obj*/);
        TimeTriggerExample& operator=(const TimeTriggerExample &/*obj*/);

    public:
        /**
         * Constructor.
         *
         * @param argc Number of command line arguments.
         * @param argv Command line arguments.
         */
        TimeTriggerExample(const int32_t &argc, char **argv);

        virtual ~TimeTriggerExample();

        odcore::data::dmcp::ModuleExitCodeMessage::ModuleExitCode body();

    private:
        virtual void setUp();

        virtual void tearDown();
};
The class odcore::base::module::TimeTriggeredConferenceClientModule provides three methods
that need to be implemented by the user: setUp(), body(), and tearDown().
These methods reflect the basic runtime cycle of a software component: An initialization
phase, followed by a time-triggered execution of an algorithm implemented in the
method body(), before the cycle ends with a call to tearDown() intended to
clean up any acquired resources.
In addition, this class uses a private and unimplemented copy constructor and assignment operator so that the compiler can warn if an object of this class is unintentionally copied or assigned.
The accompanying implementation for this header file is provided in the following.
TimeTriggerExample.cpp:
#include <iostream>

#include "TimeTriggerExample.h"

using namespace std;

// We add some of OpenDaVINCI's namespaces for the sake of readability.
using namespace odcore::base::module;

TimeTriggerExample::TimeTriggerExample(const int32_t &argc, char **argv) :
    TimeTriggeredConferenceClientModule(argc, argv, "TimeTriggerExample")
{}

TimeTriggerExample::~TimeTriggerExample() {}

void TimeTriggerExample::setUp() {
    cout << "This method is called before the component's body is executed." << endl;
}

void TimeTriggerExample::tearDown() {
    cout << "This method is called after the program flow returns from the component's body." << endl;
}

odcore::data::dmcp::ModuleExitCodeMessage::ModuleExitCode TimeTriggerExample::body() {
    cout << "Hello OpenDaVINCI World!" << endl;

    return odcore::data::dmcp::ModuleExitCodeMessage::OKAY;
}

int32_t main(int32_t argc, char **argv) {
    TimeTriggerExample tte(argc, argv);

    return tte.runModule();
}
Firstly, the constructor is implemented, delegating any commandline arguments to the
constructor of the class TimeTriggeredConferenceClientModule to obey the design
principle:
Design Principle “Single-Point-of-Truth - SPoT”: Favor a centrally maintained configuration over distributed and undocumented commandline parameters
The third parameter to the constructor of TimeTriggeredConferenceClientModule
is the name of this module, which is used to structure the centrally maintained
configuration file.
The implementation of the methods setUp() and tearDown() simply contain
explanatory text. They are meant to be used to acquire system resources or to
open peripheral components like cameras or sensors.
The main method body() is meant to be used for the implementation of the main
data processing algorithm. In this example, it simply prints an explanatory message.
The main method returns the return code 0 encoded as OKAY.
The main function is simply instantiating an object of the class TimeTriggerExample
and runs it by calling the method runModule() that is provided from its
super-classes.
You can compile and link the example:
$ g++ -std=c++11 -I /usr/include -c TimeTriggerExample.cpp -o TimeTriggerExample.o
$ g++ -o timetriggerexample TimeTriggerExample.o -lopendavinci -lpthread
To test the program, we need to run the software component life-cycle management
tool odsupercomponent; details for that tool are provided in its accompanying
manual page (man odsupercomponent). To use this tool it is required to provide a
configuration file. As the aforementioned example application does not use any
configuration data, we simply create an empty file:
$ touch configuration
If OpenDaVINCI is used on a Linux host without a network connection, the local
loopback device lo needs to be configured to allow UDP multicast sessions
before odsupercomponent can be started:
$ sudo ifconfig lo multicast

$ sudo route add -net 224.0.0.0 netmask 240.0.0.0 dev lo
If you use the ip command, you need to do:
$ sudo ip link set lo multicast on

$ sudo ip route add 224.0.0.0/4 dev lo
Next, we can run the life-cycle management application odsupercomponent:
$ odsupercomponent --cid=111 --configuration=/path/to/configuration
The first parameter specifies a unique container conference session identifier from within the range [2,254]. Thus, it is possible to host several sessions on the same host.
Now, you can start the example application providing the same container conference session identifier:
$ ./timetriggerexample --cid=111
The application will print the following on the console:
This method is called before the component's body is executed.
Hello OpenDaVINCI World!
This method is called after the program flow returns from the component's body.
If the container conference session identifier is omitted, the following exception will be thrown:
terminate called after throwing an instance of 'odcore::exceptions::InvalidArgumentException'
  what():  InvalidArgumentException: Invalid number of arguments. At least a conference group id (--cid=) needed. at /home/berger/GITHUB/Mini-Smart-Vehicles/sources/OpenDaVINCI-msv/libopendavinci/src/core/base/AbstractCIDModule.cpp: 53
Aborted
If no odsupercomponent is running, the application will exit with return code 4.
Adding configuration parameters
The next example demonstrates how to specify and use configuration parameters.
Therefore, the implementation of body() is changed to firstly print further
information about the runtime configuration and secondly, to access configuration
data.
TimeTriggerExample.cpp:
#include <iostream>

#include "TimeTriggerExample.h"

using namespace std;

// We add some of OpenDaVINCI's namespaces for the sake of readability.
using namespace odcore::base;

TimeTriggerExample::TimeTriggerExample(const int32_t &argc, char **argv) :
    TimeTriggeredConferenceClientModule(argc, argv, "TimeTriggerExample")
{}

TimeTriggerExample::~TimeTriggerExample() {}

void TimeTriggerExample::setUp() {
    cout << "This method is called before the component's body is executed." << endl;
}

void TimeTriggerExample::tearDown() {
    cout << "This method is called after the program flow returns from the component's body." << endl;
}

odcore::data::dmcp::ModuleExitCodeMessage::ModuleExitCode TimeTriggerExample::body() {
    cout << "Hello OpenDaVINCI World!" << endl;

    cout << "This is my name: " << getName() << endl;
    cout << "This is my execution frequency: " << getFrequency() << endl;
    cout << "This is my identifier: " << getIdentifier() << endl;

    cout << "  " << getKeyValueConfiguration().getValue<string>("timetriggerexample.key1") << endl;
    cout << "  " << getKeyValueConfiguration().getValue<uint32_t>("timetriggerexample.key2") << endl;
    cout << "  " << getKeyValueConfiguration().getValue<float>("timetriggerexample.key3") << endl;
    cout << "  " << getKeyValueConfiguration().getValue<string>("timetriggerexample.key4") << endl;
    cout << "  " << (getKeyValueConfiguration().getValue<bool>("timetriggerexample.key5") == 1) << endl;

    return odcore::data::dmcp::ModuleExitCodeMessage::OKAY;
}

int32_t main(int32_t argc, char **argv) {
    TimeTriggerExample tte(argc, argv);

    return tte.runModule();
}
The super-classes provide methods to get information about the runtime configuration
of a software component. getName() simply returns the name as specified to the
constructor TimeTriggeredConferenceClientModule. getFrequency() returns the
execution frequency for the software component; its value can be adjusted by specifying
the commandline parameter --freq= to the software component. The last method
getIdentifier() returns a unique identifier that can be specified at commandline
by using the parameter --id= to distinguish several instances of the same software
component; its use is shown for the configuration parameter timetriggerexample.key4
below.
The configuration file is adjusted as follows as an example:
# This is an example configuration file.
timetriggerexample.key1 = value1
timetriggerexample.key2 = 1234
timetriggerexample.key3 = 42.32

timetriggerexample.key4 = Default
timetriggerexample:1.key4 = ValueForComponent1
timetriggerexample:2.key4 = ValueForComponent2

timetriggerexample.key5 = 1
This configuration file is parsed by odsupercomponent and used to provide
component-dependent subsets from this file. The general format is:
<application name> . <key> [:<identifier>] = <value>
The application name is used to structure the content of the file; in this example,
timetriggerexample specifies all parameters that are provided from odsupercomponent
to our application. The application itself uses the template method
getKeyValueConfiguration().getValue<T>(const string &key) to retrieve values
provided in the required data type. To access the numerical value for the second
key, the application would access the value as follows:
uint32_t value = getKeyValueConfiguration().getValue<uint32_t>("timetriggerexample.key2");
The object handling the application-specific key-value-configuration is case-insensitive regarding the keys; in any case, the application’s name needs to precede a key’s name.
In the configuration, a special section can be specified using the name global. preceding
a set of keys. All keys with this preceding name are provided to all applications and thus,
shared among them.
If the same software component needs to be used with different configuration parameters,
OpenDaVINCI offers the commandline parameter --id= so that different instances of the
same application can be distinguished in the configuration. In our example, the key named
timetriggerexample.key4 provides different values regarding the commandline parameters.
For example, if the application is started as follows:
$ ./timetriggerexample --cid=111
the following request:
cout << " " << getKeyValueConfiguration().getValue<string>("timetriggerexample.key4") << endl;
would return the value Default. If, in contrast, the application is started by specifying
the identifier 1:
$ ./timetriggerexample --cid=111 --id=2
the request would return the value ValueForComponent2.
Adding time-based algorithm triggering
The next example demonstrates how to use frequency-based algorithm execution. Therefore,
the implementation of body() is changed to add a loop that is intended to be executed
until the module is stopped.
TimeTriggerExample.cpp:
#include <iostream>

#include "TimeTriggerExample.h"

using namespace std;

// We add some of OpenDaVINCI's namespaces for the sake of readability.
using namespace odcore::base;

TimeTriggerExample::TimeTriggerExample(const int32_t &argc, char **argv) :
    TimeTriggeredConferenceClientModule(argc, argv, "TimeTriggerExample")
{}

TimeTriggerExample::~TimeTriggerExample() {}

void TimeTriggerExample::setUp() {
    cout << "This method is called before the component's body is executed." << endl;
}

void TimeTriggerExample::tearDown() {
    cout << "This method is called after the program flow returns from the component's body." << endl;
}

odcore::data::dmcp::ModuleExitCodeMessage::ModuleExitCode TimeTriggerExample::body() {
    cout << "Hello OpenDaVINCI World!" << endl;

    cout << "This is my name: " << getName() << endl;
    cout << "This is my execution frequency: " << getFrequency() << endl;
    cout << "This is my identifier: " << getIdentifier() << endl;

    cout << "  " << getKeyValueConfiguration().getValue<string>("timetriggerexample.key1") << endl;
    cout << "  " << getKeyValueConfiguration().getValue<uint32_t>("timetriggerexample.key2") << endl;
    cout << "  " << getKeyValueConfiguration().getValue<float>("timetriggerexample.key3") << endl;
    cout << "  " << getKeyValueConfiguration().getValue<string>("timetriggerexample.key4") << endl;
    cout << "  " << (getKeyValueConfiguration().getValue<bool>("timetriggerexample.key5") == 1) << endl;

    while (getModuleStateAndWaitForRemainingTimeInTimeslice() == odcore::data::dmcp::ModuleStateMessage::RUNNING) {
        cout << "Inside the main processing loop." << endl;
    }

    return odcore::data::dmcp::ModuleExitCodeMessage::OKAY;
}

int32_t main(int32_t argc, char **argv) {
    TimeTriggerExample tte(argc, argv);

    return tte.runModule();
}
The method getModuleStateAndWaitForRemainingTimeInTimeslice() is provided from
the super-classes and enforces a specific runtime execution frequency. The frequency
can be specified by the commandline parameter --freq= in Hertz. For example, running
the program as follows:
$ ./timetriggerexample --cid=111 --freq=2
would print Inside the main processing loop. two times per second. Thus, the method
getModuleStateAndWaitForRemainingTimeInTimeslice() calculates how much time from the
current time slice has been consumed (in this case, 500ms would be available per time
slice) from the algorithm in the while-loop body, and would simply sleep for the rest of
the current time slice.
The program can be terminated by pressing Ctrl-C, which would result in setting the
module state to not running, leaving the while-loop body, and calling the method
tearDown(). Furthermore, stopping odsupercomponent would also result in
stopping automatically all dependent software components.
Real-time scheduling
The standard Linux kernel can meet soft real-time requirements. For time-critical algorithms requiring hard real-time, the Linux kernel with the CONFIG_PREEMPT_RT configuration item enabled can be used. More information is available here: https://rt.wiki.kernel.org/index.php/RT_PREEMPT_HOWTO.
To run an application with real-time prioritization, it must be linked with the
real-time library rt:
$ g++ -std=c++11 -I /usr/include -c TimeTriggerExample.cpp -o TimeTriggerExample.o
$ g++ -o timetriggerexample TimeTriggerExample.o -lopendavinci -lpthread -lrt
On execution, simply specify the parameter --realtime= from within the range
[1,49] to enable real-time scheduling transparently. In addition, you need to run
the application with superuser privileges to allow the configuration of the correct
scheduling priority as follows:
$ sudo ./timetriggerexample --cid=111 --freq=10 --realtime=20 --verbose=1
The output of the application would look like:
Creating multicast UDP receiver at 225.0.0.111:12175.
Creating multicast UDP receiver at 225.0.0.111:19751.
(ClientModule) discovering supercomponent...
(ClientModule) supercomponent found at IP: 10.0.2.15, Port: 19866, managedLevel: 0
(ClientModule) connecting to supercomponent...
(DMCP-ConnectionClient) sending configuration request...IP: 10.0.2.15, Port: 19866, managedLevel: 0
(DMCP-Client) Received Configuration
timetriggerexample.key1=value1
timetriggerexample.key2=1234
timetriggerexample.key3=42.32
timetriggerexample.key4=Default
timetriggerexample.key5=1

(ClientModule) connecting to supercomponent...done - managed level: 0
This method is called before the component's body is executed.
Hello OpenDaVINCI World!
This is my name: TimeTriggerExample
This is my execution frequency: 10
This is my identifier:
  value1
  1234
  42.32
  Default
Starting next cycle at 1437420074s/101149us.
Inside the main processing loop.
Starting next cycle at 1437420074s/201230us.
Inside the main processing loop.
Starting next cycle at 1437420074s/301194us.
Inside the main processing loop.
Starting next cycle at 1437420074s/400376us.
Inside the main processing loop.
Starting next cycle at 1437420074s/501003us.
Inside the main processing loop.
Starting next cycle at 1437420074s/601151us.
Inside the main processing loop.
Starting next cycle at 1437420074s/700427us.
Inside the main processing loop.
Starting next cycle at 1437420074s/800241us.
Inside the main processing loop.
Starting next cycle at 1437420074s/900387us.
Inside the main processing loop.
Starting next cycle at 1437420075s/209us.
Inside the main processing loop.
...
Please observe that your implementation within the body() shall not allocate
further memory to avoid unexpected page faults resulting in a risk to miss deadlines.
How to design a data-triggered software component
OpenDaVINCI allows the development of distributed software components. These components can run on the same machine or on different ones using various types of communication and scheduling. Both is provided transparently to the user of the OpenDaVINCI middleware.
This example demonstrates how to design a data-triggered software component. The sources for this example are available at https://github.com/se-research/OpenDaVINCI/tree/master/tutorials/datatrigger
The example consists of two components: TimeTriggeredSender that is supposed
to send regularly data updates and DataTriggeredReceiver, which will be
notified by any data sent via network. For further explanations about a
time-triggered modules, please see: https://github.com/se-research/OpenDaVINCI/tree/master/tutorials/timetrigger
Time-triggered sender
A time-triggered software component is derived from odcore::base::TimeTriggeredConferenceClientModule,
provided in <opendavinci/odcore/base/module/TimeTriggeredConferenceClientModule.h> to
realize the sending functionality.
TimeTriggeredSender.h:
#include <opendavinci/odcore/base/module/TimeTriggeredConferenceClientModule.h>

class TimeTriggeredSender : public odcore::base::module::TimeTriggeredConferenceClientModule {
    private:
        /**
         * "Forbidden" copy constructor. Goal: The compiler should warn
         * already at compile time for unwanted bugs caused by any misuse
         * of the copy constructor.
         *
         * @param obj Reference to an object of this class.
         */
        TimeTriggeredSender(const TimeTriggeredSender &/*obj*/);

        /**
         * "Forbidden" assignment operator. Goal: The compiler should warn
         * already at compile time for unwanted bugs caused by any misuse
         * of the assignment operator.
         *
         * @param obj Reference to an object of this class.
         * @return Reference to this instance.
         */
        TimeTriggeredSender& operator=(const TimeTriggeredSender &/*obj*/);

    public:
        /**
         * Constructor.
         *
         * @param argc Number of command line arguments.
         * @param argv Command line arguments.
         */
        TimeTriggeredSender(const int32_t &argc, char **argv);

        virtual ~TimeTriggeredSender();

        odcore::data::dmcp::ModuleExitCodeMessage::ModuleExitCode body();

    private:
        virtual void setUp();

        virtual void tearDown();
};
The class odcore::base::module::TimeTriggeredConferenceClientModule provides three methods
that need to be implemented by the user: setUp(), body(), and tearDown().
These methods reflect the basic runtime cycle of a software component: An initialization
phase, followed by a time-triggered execution of an algorithm implemented in the
method body(), before the cycle ends with a call to tearDown() intended to
clean up any acquired resources.
In addition, this class uses a private and unimplemented copy constructor and assignment operator so that the compiler can warn if an object of this class is unintentionally copied or assigned.
The accompanying implementation for this header file is provided in the following.
TimeTriggeredSender.cpp:
#include <iostream>

#include "opendavinci/odcore/data/TimeStamp.h"

#include "TimeTriggeredSender.h"

using namespace std;

// We add some of OpenDaVINCI's namespaces for the sake of readability.
using namespace odcore::base::module;
using namespace odcore::data;

TimeTriggeredSender::TimeTriggeredSender(const int32_t &argc, char **argv) :
    TimeTriggeredConferenceClientModule(argc, argv, "TimeTriggeredSender")
    {}

TimeTriggeredSender::~TimeTriggeredSender() {}

void TimeTriggeredSender::setUp() {
    cout << "This method is called before the component's body is executed." << endl;
}

void TimeTriggeredSender::tearDown() {
    cout << "This method is called after the program flow returns from the component's body." << endl;
}

odcore::data::dmcp::ModuleExitCodeMessage::ModuleExitCode TimeTriggeredSender::body() {
    uint32_t i = 0;
    while (getModuleStateAndWaitForRemainingTimeInTimeslice() == odcore::data::dmcp::ModuleStateMessage::RUNNING) {
        cout << "Sending " << i << "-th time stamp data...";
        TimeStamp ts(i, 2*i++);
        Container c(ts);
        getConference().send(c);
        cout << "done." << endl;
    }

    return odcore::data::dmcp::ModuleExitCodeMessage::OKAY;
}

int32_t main(int32_t argc, char **argv) {
    TimeTriggeredSender tts(argc, argv);

    return tts.runModule();
}
Firstly, the constructor is implemented, delegating any commandline arguments to the
constructor of the class TimeTriggeredConferenceClientModule to obey the design
principle:
Design Principle “Single-Point-of-Truth - SPoT”: Favor a centrally maintained configuration over distributed and undocumented commandline parameters
The third parameter to the constructor of TimeTriggeredConferenceClientModule
is the name of this module, which is used to structure the centrally maintained
configuration file.
The implementation of the methods setUp() and tearDown() simply contain
explanatory text. They are meant to be used to acquire system resources or to
open peripheral components like cameras or sensors.
The main method body() is meant to be used for the implementation of the main
data processing algorithm. The main while-loop is executed based on the specified
runtime frequency of the software component. To send data with OpenDaVINCI, it
must be packed into a Container that adds additional information like
type of the contained payload, the sent time point when the container
left the sending software computer (for instance a sending computer), and the
time point, when the container was received at the other end (e.g. another computer).
As an example, we simply send an instance of the class TimeStamp where we
pass some example data to its constructor. Next, we create a Container by
encapsulating object to be sent.
To finally send data with OpenDaVINCI, we use the method getConference().send(Container &c)
provided for any class deriving from TimeTriggeredConferenceClientModule.
The main communication principle provided with OpenDaVINCI is publish/subscribe:
https://en.wikipedia.org/wiki/Publish%E2%80%93subscribe_pattern. Depending on
the command line parameters passed to odsupercomponent, the concrete
communication is realized either as packets sent via UDP multicast, or via
odsupercomponent acting as a central communication hub (this functionality
is for instance necessary for distributed simulations). For the user application,
the concrete pattern in use is transparent and our data is simply handed over
to OpenDaVINCI to conduct the necessary steps by calling getConference().send(c).
The main method returns the return code 0 encoded as OKAY.
The main function is simply instantiating an object of the class TimeTriggerExample
and runs it by calling the method runModule() that is provided from its
super-classes.
You can compile and link the example:
$ g++ -std=c++11 -I /usr/include -c TimeTriggeredSender.cpp -o TimeTriggeredSender.o
$ g++ -o timetriggeredsender TimeTriggeredSender.o -lopendavinci -lpthread
Data-triggered receiver
To receive the sent data, a data-triggered software component is derived from
odcore::base::DataTriggeredConferenceClientModule, provided in
<opendavinci/odcore/base/module/DataTriggeredConferenceClientModule.h> to realize the
receiving functionality.
DataTriggeredReceiver.h:
#include <opendavinci/odcore/base/module/DataTriggeredConferenceClientModule.h>

class DataTriggeredReceiver : public odcore::base::module::DataTriggeredConferenceClientModule {
    private:
        /**
         * "Forbidden" copy constructor. Goal: The compiler should warn
         * already at compile time for unwanted bugs caused by any misuse
         * of the copy constructor.
         *
         * @param obj Reference to an object of this class.
         */
        DataTriggeredReceiver(const DataTriggeredReceiver &/*obj*/);

        /**
         * "Forbidden" assignment operator. Goal: The compiler should warn
         * already at compile time for unwanted bugs caused by any misuse
         * of the assignment operator.
         *
         * @param obj Reference to an object of this class.
         * @return Reference to this instance.
         */
        DataTriggeredReceiver& operator=(const DataTriggeredReceiver &/*obj*/);

    public:
        /**
         * Constructor.
         *
         * @param argc Number of command line arguments.
         * @param argv Command line arguments.
         */
        DataTriggeredReceiver(const int32_t &argc, char **argv);

        virtual ~DataTriggeredReceiver();

        virtual void nextContainer(odcore::data::Container &c);

    private:
        virtual void setUp();

        virtual void tearDown();
};
The class odcore::base::module::DataTriggeredConferenceClientModule provides three methods
that need to be implemented by the user: setUp(), tearDowny(), and nextContainer(odcore::data::Container &c).
These methods reflect the basic runtime cycle of a software component: An initialization
phase, followed by a data-triggered execution of an algorithm implemented in the
method nextContainer(), before the cycle ends with a call to tearDown() intended to
clean up any acquired resources.
In addition, this class uses a private and unimplemented copy constructor and assignment operator so that the compiler can warn if an object of this class is unintentionally copied or assigned.
The accompanying implementation for this header file is provided in the following.
DataTriggeredReceiver.cpp:
#include <iostream>

#include "DataTriggeredReceiver.h"
#include "opendavinci/odcore/data/TimeStamp.h"

using namespace std;

// We add some of OpenDaVINCI's namespaces for the sake of readability.
using namespace odcore::base::module;
using namespace odcore::data;

DataTriggeredReceiver::DataTriggeredReceiver(const int32_t &argc, char **argv) :
    DataTriggeredConferenceClientModule(argc, argv, "DataTriggeredReceiver")
{}

DataTriggeredReceiver::~DataTriggeredReceiver() {}

void DataTriggeredReceiver::setUp() {
    cout << "This method is called before the component's body is executed." << endl;
}

void DataTriggeredReceiver::tearDown() {
    cout << "This method is called after the program flow returns from the component's body." << endl;
}

void DataTriggeredReceiver::nextContainer(Container &c) {
    cout << "Received container of type " << c.getDataType() <<
                              " sent at " << c.getSentTimeStamp().getYYYYMMDD_HHMMSSms() <<
                          " received at " << c.getReceivedTimeStamp().getYYYYMMDD_HHMMSSms() << endl;

    if (c.getDataType() == TimeStamp::ID()) {
        TimeStamp ts = c.getData<TimeStamp>();
        cout << "Received the following time stamp: " << ts.toString() << endl;
    }
}

int32_t main(int32_t argc, char **argv) {
    DataTriggeredReceiver dtr(argc, argv);

    return dtr.runModule();
}
Firstly, the constructor is implemented, delegating any commandline arguments to the
constructor of the class DataTriggeredConferenceClientModule to obey the design
principle:
Design Principle “Single-Point-of-Truth - SPoT”: Favor a centrally maintained configuration over distributed and undocumented commandline parameters
The third parameter to the constructor of DataTriggeredConferenceClientModule
is the name of this module, which is used to structure the centrally maintained
configuration file.
The implementation of the methods setUp() and tearDown() simply contain
explanatory text. They are meant to be used to acquire system resources or to
open peripheral components like cameras or sensors.
The data-triggered method nextContainer(odcore::data::Container &c) is called
whenever a new Container is received. The first lines simply print some
meta-information about received container like contained data type as an
enum-encoded number, time stamp when the container left the sending software
component, and the time stamp when it was received at our end. As we are interested
in data of type TimeStamp::ID(), we are checking for that type.
Once we have received the data of interest, the content of the container is
unpacked by using the template method Container::getData<T>() where we
specify with T the desired type. In our case, we access its content by specifying
the type TimeStamp. Finally, the values of TimeStamp are printed to
stdout by using the data structure’s method toString().
The main function is simply instantiating an object of the class TimeTriggerExample
and runs it by calling the method runModule() that is provided from its
super-classes.
You can compile and link the example:
$ g++ -std=c++11 -I /usr/include -c DataTriggeredReceiver.cpp -o DataTriggeredReceiver.o
$ g++ -o datatriggeredreceiver DataTriggeredReceiver.o -lopendavinci -lpthread
Running the example program
To test the programs, we need to run the software component life-cycle management
tool odsupercomponent; details for that tool are provided in its accompanying
manual page (man odsupercomponent). To use this tool it is required to provide a
configuration file. As the aforementioned example applications do not use any
configuration data, we simply create an empty file:
$ touch configuration
If OpenDaVINCI is used on a Linux host without a network connection, the local
loopback device lo needs to be configured to allow UDP multicast sessions
before odsupercomponent can be started:
$ sudo ifconfig lo multicast

$ sudo route add -net 224.0.0.0 netmask 240.0.0.0 dev lo
If you use the ip command, you need to do:
$ sudo ip link set lo multicast on

$ sudo ip route add 224.0.0.0/4 dev lo
Next, we can run the life-cycle management application odsupercomponent:
$ odsupercomponent --cid=111 --configuration=/path/to/configuration
The first parameter specifies a unique container conference session identifier from within the range [2,254]. Thus, it is possible to host several sessions on the same host.
Now, you can start the data triggered receiver application providing the same container conference session identifier:
$ ./datatriggeredreceiver --cid=111
The application will start to print something similar to the following on the console:
Received container of type 8 sent at 2015-07-31 13:53:23.847738 received at 2015-07-31 13:53:23.848420
Received container of type 8 sent at 2015-07-31 13:53:25.849773 received at 2015-07-31 13:53:25.850541
Received container of type 8 sent at 2015-07-31 13:53:27.851393 received at 2015-07-31 13:53:27.851924
Received container of type 8 sent at 2015-07-31 13:53:29.852550 received at 2015-07-31 13:53:29.853406
Received container of type 8 sent at 2015-07-31 13:53:31.854014 received at 2015-07-31 13:53:31.854474
...
Containers of this type carry information about ModuleStatistics that are used and
evaluated by odsupercomponent.
Next, we start the time triggered sender providing the same container conference session identifier:
$ ./timetriggeredsender --cid=111
The application will start to print the following on the console:
Sending 0-th time stamp data...done.
Sending 1-th time stamp data...done.
Sending 2-th time stamp data...done.
Sending 3-th time stamp data...done.
...
The data-triggered application in turn will print the following on the console:
...
Received container of type 12 sent at 2015-07-31 13:53:33.68143 received at 2015-07-31 13:53:33.68858
Received the following time stamp: 1s/0us.
Received container of type 8 sent at 2015-07-31 13:53:33.855026 received at 2015-07-31 13:53:33.855697
Received container of type 12 sent at 2015-07-31 13:53:34.67304 received at 2015-07-31 13:53:34.67797
Received the following time stamp: 2s/2us.
Received container of type 12 sent at 2015-07-31 13:53:35.68291 received at 2015-07-31 13:53:35.69396
Received the following time stamp: 3s/4us.
Received container of type 8 sent at 2015-07-31 13:53:35.856238 received at 2015-07-31 13:53:35.856762
Received container of type 12 sent at 2015-07-31 13:53:36.68194 received at 2015-07-31 13:53:36.69174
Received the following time stamp: 4s/6us.
Received container of type 12 sent at 2015-07-31 13:53:37.67420 received at 2015-07-31 13:53:37.68540
Received the following time stamp: 5s/8us.
Received container of type 8 sent at 2015-07-31 13:53:37.858281 received at 2015-07-31 13:53:37.858938
Received container of type 12 sent at 2015-07-31 13:53:38.67384 received at 2015-07-31 13:53:38.67959
Received the following time stamp: 6s/10us.
Received container of type 12 sent at 2015-07-31 13:53:39.67400 received at 2015-07-31 13:53:39.68423
Received the following time stamp: 7s/12us.
...
If the container conference session identifier is omitted, the following exception will be thrown:
terminate called after throwing an instance of 'core::exceptions::InvalidArgumentException'
  what():  InvalidArgumentException: Invalid number of arguments. At least a conference group id (--cid=) needed. at /home/berger/GITHUB/Mini-Smart-Vehicles/sources/OpenDaVINCI/libopendavinci/src/core/base/module/AbstractCIDModule.cpp: 53
Aborted
If no odsupercomponent is running, the application will exit with return code 4.
How to use simulation and visualization
This tutorial explains how to use OpenDaVINCI for simulation and visualization (Ubuntu 14.04).
Installation
OpenDaVINCI has several extended libraries for simulation and visualization. The first extended library is odsimulation-odsimtools, which contains components such as odsimvehicle, odsimcamera, and odsimirus, for simulation. The second extended library is opendavinci-odcockpit used for visualization. odcockpit supports visualization for both simulation and real systems.
The tutorial on installing precompiled OpenDaVINCI libraries (http://opendavinci.readthedocs.org/en/latest/installation.pre-compiled.html#adding-opendavinci-to-your-ubuntu-14-04-linux-distribution) does not install these two libraries by default. In order to install odsimulation-odsimtools and opendavinci-odcockpit for simulation and visualization purposes, replace Step 4 at http://opendavinci.readthedocs.org/en/latest/installation.pre-compiled.html#adding-opendavinci-to-your-ubuntu-14-04-linux-distribution:
$ sudo apt-get install opendavinci-lib opendavinci-odtools opendavinci-odsupercomponent
with:
$ sudo apt-get install opendavinci-lib opendavinci-odtools opendavinci-odsupercomponent odsimulation-odsimtools opendavinci-odcockpit
After the installation, you will find all the OpenDaVINCI binaries (including binaries for simulation and visualization: odsimvehicle, odsimcamera, odsimirus, and odcockpit) in /usr/bin/.
Running the boxparker example in simulation
The boxparker example demonstrates a self-parking algorithm in the OpenDaVINCI simulation environment. A tutorial on how to build the boxparker from sources and run it in Docker image can be found at https://github.com/se-research/OpenDaVINCI/tree/master/automotive/miniature/boxparker. This tutorial gives instructions on running boxparker in simulation without Docker. The boxparker example involves the execution of (1) odsupercomponent: the lifecycle management component of OpenDaVINCI; (2) odsimvehicle: for vehicle movement simulation; (3) odsimirus: for generating distances from obstacles in simulation; (4) odcockpit: the visualization tool; (5) boxparker: the boxparker application.
This tutorial assumes that (1) OpenDaVINCI has been installed at /opt/od/ after being built from sources; and (2) boxparker has been compiled by following https://github.com/se-research/OpenDaVINCI/tree/master/automotive/miniature/boxparker. Then the binaries of the first 4 components can be found at /opt/od/bin, while the boxparker binary should be at automotive/miniature/boxparker/build within the OpenDaVINCI source code folder.
First, download the configuration and scenario files from http://www.cse.chalmers.se/~bergerc/dit168/example.zip, including a configuration file used by odsupercomponent, and two scenario files Car1.objx and Parking_boxes.scnx. Copy these files to /opt/od/bin/ and then go to this directory:
$ cd /opt/od/bin/
Run odsupercomponent:
$ LD_LIBRARY_PATH=/opt/od/lib ./odsupercomponent --cid=111
In a new terminal, run odsimvehicle:
$ LD_LIBRARY_PATH=/opt/od/lib ./odsimvehicle --cid=111 --freq=10
In a new terminal, run odsimirus:
$ LD_LIBRARY_PATH=/opt/od/lib ./odsimirus --cid=111 --freq=10
In a new terminal, run odcockpit:
$ LD_LIBRARY_PATH=/opt/od/lib ./odcockpit --cid=111
In odcockpit window, open the BirdsEyeMap plugin. You will see a static car and its surroundings for parking.
Go to the boxparker binary directory and run boxparker in a new terminal:
$ ./boxparker --cid=111 --freq=10
The car in the BirdsEyeMap window in odcockpit will start moving and stop after it successfully finds a parking slot. Meanwhile, you can open the IrUsMap window and IrUsCharts window on the left side to observe the infrared and ultrasonic sensor data readings.
Noise model for odsimirus
OpenDaVINCI provides a noise model for the odsimirus component to test the robustness of an algorithm (e.g., lane following) in simulation. The noise model is specified in the configuration file for odsupercomponent. For instance, the following specifies the noise model for sensor 0:
- odsimirus.sensor0.faultModel.noise = 0.1
- odsimirus.sensor0.faultModel.skip = 0.05
The first parameter ranges from 0 to 1 and reflects an additional noise to be added from the range [-1,+1]. The implementation is at https://github.com/se-research/OpenDaVINCI/blob/master/libopendlv/src/model/PointSensor.cpp#L164.
The second parameter ranges from 0 to 1 and reflects the dropped frames/missing readings. The implementation is at https://github.com/se-research/OpenDaVINCI/blob/master/libopendlv/src/model/PointSensor.cpp#L187.
The figure below shows a visualization screenshot using the aforementioned parameters.
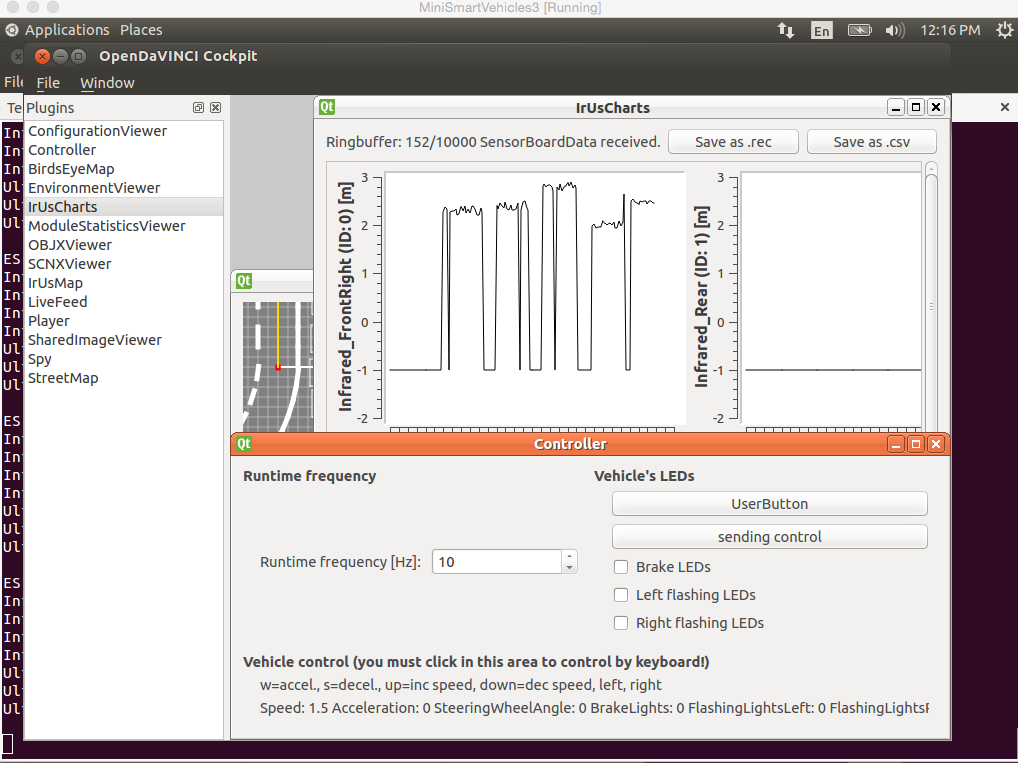
How to read content from a zip file
OpenDaVINCI has a built-in function for decompressing zip files.
The sources for this example are available at https://github.com/se-research/OpenDaVINCI/tree/master/tutorials/readzipfile
In order to read content from a zip file, you will find a simple example below.
readzipfile.cpp:
#include <fstream>
#include <iostream>
#include <sstream>
#include <string>
#include <opendavinci/odcore/wrapper/CompressionFactory.h>
#include <opendavinci/odcore/wrapper/DecompressedData.h>

using namespace std;

int32_t main(int32_t argc, char **argv) {
    // Read a zip file in binary form. It is originally a csv file containing sample data of a 64-layer Velodyne sensor.
    //The csv file stores the data of 10 points, including the x, y, z coordinate and intensity value of each point. All values are represented by float numbers.
    fstream fin("velodyneDataPoint.zip", ios::binary | ios::in);
    std::shared_ptr<odcore::wrapper::DecompressedData> dd = odcore::wrapper::CompressionFactory::getContents(fin);  //Decompress the zip file and use a shared pointer to point to the decompressed data
    fin.close();
    vector<string> entries = dd->getListOfEntries();
    //In this example, the decompressed data contains only one entry, which is the name of the csv file before compression
    //entries.at(0) returns the first entry
    cout<<"Number if entries: "<<entries.size()<<"; the name of the first entry: "<<entries.at(0)<<endl;
    std::shared_ptr<istream> stream = dd->getInputStreamFor(entries.at(0));//Prepare an input stream from the csv file to fill a buffer
    stringstream decompressedData;  //a buffer storing all the information of the csv file
    if(stream.get()){
        char c;
        while(stream->get(c)){
            decompressedData<<c;  //Fill the buffer
        }
    }
    //Now decompressedData contains all the data from the original csv file. Use decompressedData to extract information from the csv file
    string value;
    getline(decompressedData,value); //Skip the title row of the csv file
    vector<float> xDataV;
    vector<float> yDataV;
    vector<float> zDataV;
    vector<float> intensityV;
    while(getline(decompressedData,value)){  //Read the csv file row by row
        stringstream lineStream(value);
        string cell;
        getline(lineStream,cell,',');  //Read the x, y, z coordinate and intensity of each point
        xDataV.push_back(stof(cell));
        getline(lineStream,cell,',');
        yDataV.push_back(stof(cell));
        getline(lineStream,cell,',');
        zDataV.push_back(stof(cell));
        getline(lineStream,cell,',');
        intensityV.push_back(stof(cell));
    }
    cout<<"Number of rows read: "<<xDataV.size()<<endl;  //Display the number of points extracted from the csv file
    for(uint32_t i=0;i<10;i++){
        cout<<"x: "<<xDataV[i]<<", y: "<<yDataV[i]<<", z: "<<zDataV[i]<<", intensity: "<<intensityV[i]<<endl;  //List the x, y, z coordinate and intensity of the 10 points
    }
}
This example reads a zip file velodyneDataPoint.zip which is original a csv file velodyneDataPoint.csv before compression. The csv file contains sample data of a 64-layer Velodyne sensor. It stores the x, y, z coordinate and intensity value of 10 points. Hence, the csv file has 11 rows (one row for each point plus the title row on top) and 4 columns (x, y, z, intensity). All values are represented by float numbers.
To read content from a zip file, your application needs to include <opendavinci/odcore/wrapper/CompressionFactory.h> and <opendavinci/odcore/wrapper/DecompressedData.h> that encapsulate the platform-specific implementations.
CompressionFactory provides a static method called getContents that allows you to decompress a zip file. To conveniently handle the resource management of releasing the acquired system resources, a std::shared_ptr is used that automatically releases memory that is no longer used.
A getListOfEntries method is used to return the list of entries in the decompressed data. A zip file containing multiple files has multiple entries, one entry for each file. velodyneDataPoint.zip contains 1 entry, which is the name of the csv file before compression: velodyneDataPoint.csv, which is returned by entries.at(0) in this example. Then getInputStreamFor(entries.at(0)) prepares an input stream from the csv file to fill a buffer decompressedData that stores all the information of the csv file. decompressedData will be used to extract rows and columns from the csv file.
You can compile and link the example:
g++ -std=c++11 -I /usr/include -c readzipfile.cpp -o readzipfile.o
g++ -o readzipfile readzipfile.o -lopendavinci -lpthread
To test the program, run:
$ ./readzipfile
$
The x, y, z coordinate and intensity of the 10 points extracted from the csv file will be printed to the console:
Number of entries: 1; the name of the first entry: velodyneDataPoint.csv
Number of rows read: 89105
x: 1.24821, y: 13.424, z: -1.52942, intensity: 22
x: 0.851616, y: 14.2127, z: -1.54146, intensity: 28
x: -0.777795, y: 18.337, z: 0.287256, intensity: 102
x: -1.46898, y: 18.3918, z: 0.386122, intensity: 69
x: 0.26113, y: 14.4262, z: -1.48172, intensity: 34
x: -0.272345, y: 14.8803, z: -1.43373, intensity: 40
x: 0.38511, y: 12.197, z: -1.66423, intensity: 32
x: -0.0547113, y: 12.806, z: -1.67453, intensity: 27
x: -0.86384, y: 15.1217, z: -1.37554, intensity: 37
x: -1.45687, y: 15.7513, z: -1.34796, intensity: 44